
Introduction to Cheeseburger Pockets
Cheeseburger pockets are a delightful twist on a classic comfort food that are sure to become a staple in your kitchen. Have you ever craved a cheeseburger but wanted something a little more portable? That’s where these handheld delights come into play! They’re not only fun to make but also an incredible option for meal prep, lunchboxes, or a quick weeknight dinner.
Why Homemade Cheeseburger Pockets Are a Game Changer?
Homemade cheeseburger pockets are a game changer for several reasons:
-
Customization: You control the ingredients! Want extra cheese or a spicy kick with jalapeños? Go for it! You can even swap in turkey bacon or chicken ham for a unique flavor profile.
-
Freshness: Nothing beats the taste of freshly baked dough filled with a savory cheeseburger filling. Plus, when you make them at home, you can use quality ingredients that suit your palate.
-
Convenience: These pockets are easy to freeze and reheat, making them perfect for busy individuals. You can whip up a batch ahead of time for quick meals.
For more ideas on meal prepping, check out related sources like Meal Prep on Fleek. Whether you're hosting a gathering or just feeding yourself, cheeseburger pockets offer a delightful, versatile solution that brings satisfaction in every bite!

Ingredients for Cheeseburger Pockets
When it comes to crafting delightful cheeseburger pockets, the right ingredients can make all the difference. Here’s a closer look at what you’ll need for both the filling and the dough to create these savory treats!
Essential Ingredients for the Filling
For the heart of your cheeseburger pockets, gather these essential components:
- 1 pound ground beef: Lean ground beef provides that classic cheeseburger flavor.
- 1 small yellow onion, finely diced: Adds subtle sweetness and depth.
- 2 cloves garlic, minced: Enhances the taste with aromatic goodness.
- 2 tablespoons ketchup: For that tangy sweetness.
- 1 teaspoon yellow mustard: Adds a delightful zing.
- 1 teaspoon Worcestershire sauce: Deepens the flavor profile.
- ¼ cup dill pickle slices, finely chopped (optional): For an unexpected crunch and tang.
- Shredded sharp cheddar cheese: The ultimate melty finish.
For a full experience, check out food science insights on flavor pairing to elevate your fillings.
Must-Have Ingredients for the Dough
Now, for a perfect pocket exterior, you’ll need:
- 1 can (13.8 ounces) refrigerated pizza dough: Easy to handle and perfectly pliable.
- 1 large egg: Essential for a beautiful golden crust.
- 1 tablespoon water: Helps to create a nice egg wash.
- 1 tablespoon sesame seeds (optional): For a touch of elegance and crunch.
Don’t underestimate the power of the dough! You can read about how different types of dough influence texture and flavor [here]. Following the outlined ingredients and tips, you’ll whip up cheeseburger pockets that are as tasty as they are fun to make!
Step-by-Step Preparation of Cheeseburger Pockets
Making cheeseburger pockets at home is not only fun but also a fantastic way to satisfy your cravings for a quick and scrumptious meal. Let’s break down the process step by step, ensuring you get crispy, delicious pockets filled with cheesy goodness.
Prepping the Beef Filling
The first step is all about creating that savory beef filling. Start by heating a large skillet over medium-high heat. Add 1 pound of ground beef along with a small yellow onion, finely diced. Brown the beef and soften the onions, stirring often for about 6 to 8 minutes. Once cooked, drain any excess fat from the skillet to lighten the filling. Lower the heat to medium, then add 2 cloves of minced garlic and sauté for about 30 seconds until it’s fragrant. Mix in 2 tablespoons of ketchup, 1 teaspoon each of yellow mustard and Worcestershire sauce, ½ teaspoon of salt, and ¼ teaspoon of black pepper. For an extra pop of flavor, you can stir in ¼ cup of finely chopped dill pickles (if you like). Remove from heat and let it cool for 5 minutes while you prepare the dough.
Rolling Out the Pizza Dough
Next comes the dough. Lightly flour a clean work surface and roll out 1 can of refrigerated pizza dough into a rectangle that’s about 12 by 16 inches. Once rolled out, use a pizza cutter or a sharp knife to cut the dough into 8 equal squares. This step is crucial, as it ensures each cheeseburger pocket is perfectly sized for your filling.
Filling the Pockets
Now, it’s the fun part: filling those pockets! Take 2 to 3 tablespoons of your beef filling and place it in the center of each dough square. For a cheesy surprise, top each portion off with about 3 tablespoons of freshly shredded sharp cheddar cheese. The melting cheese will add a delightful burst of flavor that’s hard to resist!
Sealing the Pockets
To seal your cheeseburger pockets, fold the pizza dough over the filling to create a rectangular pocket. Press the edges firmly to keep everything contained, then use a fork to crimp the edges. This not only secures your filling but also creates a nice little design that looks presentable and appetizing.
Baking the Cheeseburger Pockets
Preheat your oven to 400°F and line a large baking sheet with parchment paper. Place your filled and sealed pockets onto the prepared baking sheet. In a small bowl, whisk together 1 large egg and 1 tablespoon of water to create an egg wash. Brush the tops of your pockets generously with the egg wash for a golden-brown finish. If you're feeling fancy, sprinkle with some sesame seeds. Bake in the preheated oven for 18 to 22 minutes until they're deep golden brown. Once out of the oven, let them rest for 5 minutes before digging in.
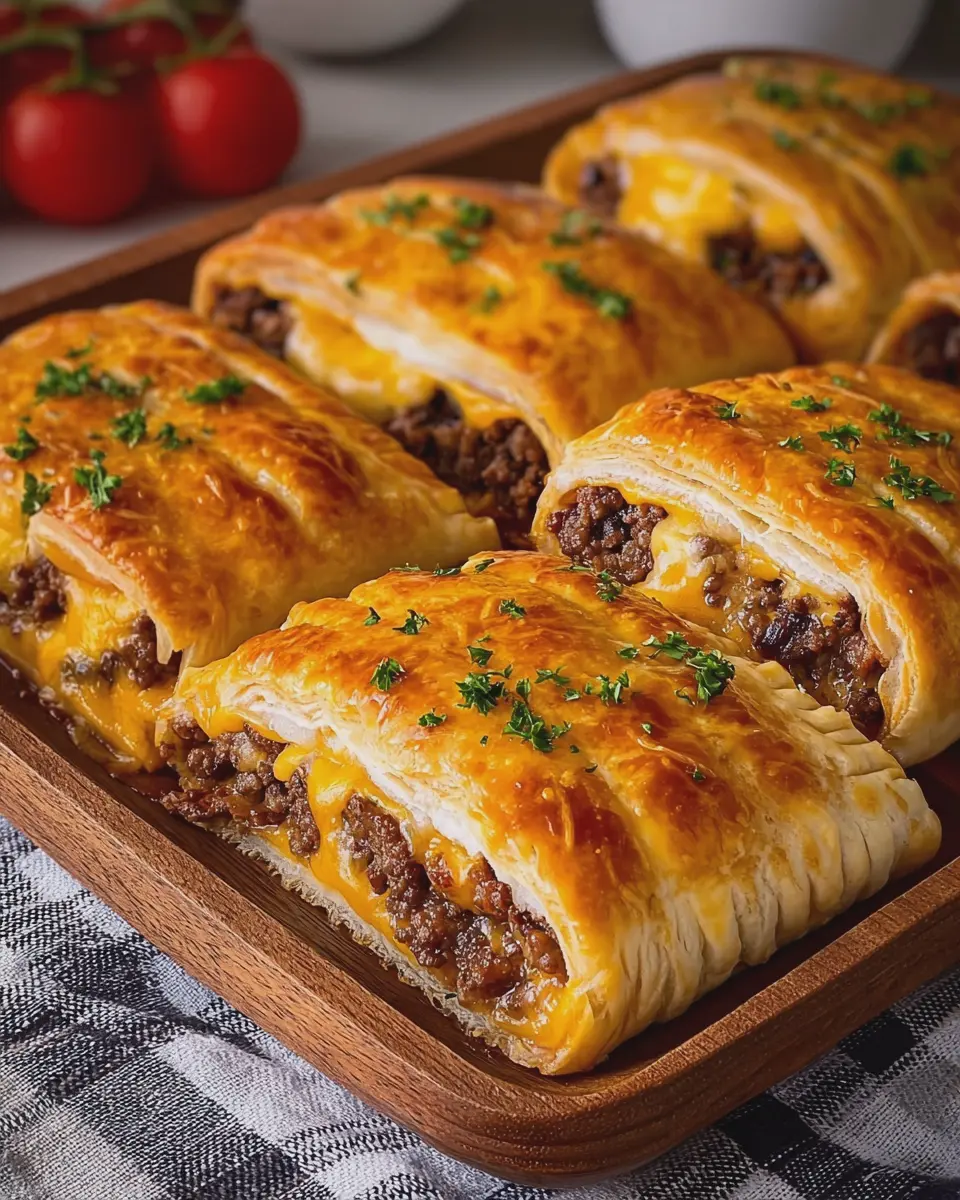
These cheeseburger pockets are perfect for meal prep, game day snacks, or a quick weeknight dinner. They'll surely impress your friends and family!

Variations on Cheeseburger Pockets
Cheeseburger Pockets with Turkey Bacon
For a delightful twist on classic cheeseburger pockets, consider adding turkey bacon. Simply sauté the turkey bacon until crispy, then chop it into small pieces and mix it with the ground beef for an extra layer of flavor. The smoky taste of turkey bacon complements the gooey cheese and savory beef beautifully. This variation provides a leaner option while still satisfying your cravings—perfect for a cozy dinner at home!
Vegetarian Cheeseburger Pockets
Want a meat-free alternative? Try making vegetarian cheeseburger pockets! Use a combination of sautéed mushrooms, black beans, and quinoa for a hearty filling. Season with your favorite herbs and spices to boost the flavor. Top it all off with some sharp cheddar cheese for that classic cheeseburger taste. This variation is not only healthy but also packed with nutrients, making it an excellent choice for your next meatless meal!
For additional inspiration on variations of this recipe, check out Simply Recipes or Food Network.
Cooking Tips and Notes for Cheeseburger Pockets
Tips for achieving the perfect crust
For perfectly golden cheeseburger pockets, start by preheating your oven to 400°F, which helps achieve that crispy texture. Make sure to brush the pockets with egg wash; this adds a beautiful shine and color. Avoid overfilling your pockets to prevent them from bursting during baking. Using fresh refrigerated pizza dough will give you a light and fluffy crust, but rolling it out evenly is key to an even bake.
Notes on seasoning and flavor enhancement
Flavor is everything! When seasoning your beef mixture, don’t hesitate to add a pinch of smoked paprika or a dash of hot sauce for a little kick. Experiment with different cheeses—like pepper jack or gouda—to customize your cheeseburger pockets. If you love herbs, toss in some fresh parsley or dill. It’s all about personal taste, so feel free to adapt to your palate. Happy cooking!
Serving Suggestions for Cheeseburger Pockets
Pairing Suggestions for Sides
Transform your cheeseburger pockets into a complete meal with the right sides! Consider serving them alongside crispy sweet potato fries or a bright garden salad with a zesty vinaigrette to balance the savory flavors. For a fun twist, opt for onion rings or cole slaw to give your plate a tasty crunch. If you have a bit of time, whip up a batch of macaroni salad for a classic pairing that everyone loves.
Ideal Dipping Sauces to Serve
Don’t forget the sauces! A tangy balsamic glaze or a zesty barbecue sauce can elevate your cheeseburger pockets to new heights. For a creamy option, serve a delightful ranch dressing or a classic ketchup and mustard combo for that authentic burger experience. Want to kick it up a notch? A spicy sriracha mayo adds a bold flavor that’s sure to impress your guests!
For more ideas and variations, check out this helpful resource on delicious dipping sauces. Enjoy your meal!
Time Breakdown for Cheeseburger Pockets
Preparation Time
Getting your ingredients ready for the cheeseburger pockets takes about 20 minutes. This is when you'll dice your onions, mince garlic, and mix things up for that delicious filling. Don’t rush; a little prep goes a long way in flavor!
Cooking Time
Once your filling is cooled, baking these pockets will take an additional 30 minutes. It’s a perfect time to tidy up your kitchen or set the table—because you’ll want to dig in as soon as they’re out of the oven!
Total Time
In just 50 minutes, from prep to plate, you can enjoy a warm batch of cheeseburger pockets. Simple, right? Set that timer, and you’re on your way to a tasty meal that’s sure to impress friends or family.
If you’re interested in other quick meals, check out some of our favorites like easy homemade pizza that can be whipped up in no time too!
Nutritional Facts for Cheeseburger Pockets
Calories per serving
Each serving of these delightful cheeseburger pockets contains approximately 570 calories. It’s a satisfying option for a fulfilling dinner or a cozy weekend treat.
Protein content
You’ll gain about 29 grams of protein per pocket, thanks to the ground beef and cheese. This makes it an excellent choice for those looking to boost their protein intake, keeping you energized and full!
Key nutrients to consider
When enjoying your cheeseburger pockets, consider the following nutrients:
- Calcium: The sharp cheddar cheese provides significant calcium, supporting bone health.
- Iron: The beef offers a great source of iron, essential for creating red blood cells.
- Vitamins: Onions and garlic also pack in vitamins and antioxidants, contributing to a well-rounded meal.
For more detailed nutritional insights, consult resources like the USDA FoodData Central.
With tasty options that are both satisfying and nutritious, these cheeseburger pockets make for a delightful addition to your recipe arsenal. Enjoy the good flavors while also caring for your nutritional needs!
FAQs about Cheeseburger Pockets
Can I make cheeseburger pockets ahead of time?
Absolutely! You can prepare the filling a day in advance and store it in your fridge. When you're ready to assemble, simply roll out your pizza dough, fill, and bake. This is a great way to save time on a busy weeknight!
How can I freeze leftover cheeseburger pockets?
Freezing is easy! Once baked, let your cheeseburger pockets cool completely. Place them in an airtight container or freezer bag, separating layers with parchment paper to avoid sticking. They’ll keep well for up to 3 months. When you’re ready to enjoy them, reheat in the oven to maintain that golden crust.
What are some good dipping sauces for cheeseburger pockets?
Get creative with your dipping sauces! Here are a few ideas that pair nicely:
- Classic ketchup or mustard
- Spicy sriracha mayo
- Tangy BBQ sauce
- Creamy ranch or blue cheese dressing
These sauces not only complement the cheeseburger pockets but also elevate your snacking experience! For more inspiration, check out Serious Eats for innovative sauce ideas.
Conclusion on Cheeseburger Pockets
Making your own cheeseburger pockets is a delightful way to enjoy a classic favorite in a fun, portable form. With simple ingredients and an easy-to-follow process, these golden pockets are perfect for busy weeknights. Plus, they’re customizable—add your favorite toppings or sauces for an extra twist!
Final thoughts on making your own cheeseburger pockets
Cooking should feel rewarding, and creating cheeseburger pockets from scratch certainly meets that mark! Whether for a casual dinner or a game-day snack, these pockets can make any meal special. Don't hesitate to experiment with different fillings or spices, inspiring your culinary creativity. Check out more recipe inspiration from sources like Serious Eats or Bon Appétit for more exciting ideas!

Cheeseburger Pockets
Ingredients
Equipment
Method
- Preheat the oven to 400°F.
- Line a large baking sheet with parchment paper.
- Heat a large skillet over medium high heat.
- Add the ground beef and finely diced onion.
- Cook for 6 to 8 minutes while breaking the beef into small pieces until the beef is browned and the onion is softened.
- Drain any excess fat from the skillet.
- Reduce the heat to medium.
- Add the minced garlic.
- Cook for about 30 seconds until fragrant.
- Stir in the ketchup, yellow mustard, Worcestershire sauce, salt, and black pepper.
- Cook for 1 to 2 minutes until evenly combined.
- Stir in the chopped dill pickles if using.
- Remove the skillet from the heat and allow the beef filling to cool for 5 minutes.
- Lightly flour a clean work surface and roll the pizza dough into a rectangle about 12 by 16 inches.
- Cut the dough into 8 equal squares.
- Place 2 to 3 tablespoons of beef filling in the center of each dough square.
- Top each portion with about 3 tablespoons shredded cheddar cheese.
- Fold the dough over the filling to form a rectangular pocket and press the edges firmly together.
- Crimp the edges with a fork to seal tightly.
- Transfer the pockets to the prepared baking sheet.
- Place the egg and water in a small bowl and whisk until combined.
- Brush the tops of the pockets generously with the egg wash and sprinkle with sesame seeds if desired.
- Bake for 18 to 22 minutes until the pockets are deep golden brown.
- Remove from the oven and allow the pockets to rest for 5 minutes before serving.
- Serve warm.



Leave a Reply