
Introduction to Cheeseburger Pockets
Why Homemade Cheeseburger Pockets Are a Game-Changer
If you're looking for a fun twist on a classic favorite, cheeseburger pockets might just become your new go-to meal! These bite-sized delights pack all the savory flavors of a cheeseburger into a portable, flaky package, making them perfect for busy weeknights or casual get-togethers. Imagine devouring a cheeseburger without the mess—pure bliss!
Making cheeseburger pockets at home is not only easier than you think, but it also allows you to customize ingredients to suit your taste. Want to swap out onions for diced bell peppers? Go for it! Having a craving for extra cheese? The more, the merrier! With a short prep time of just 15 minutes, you can whip these up in no time. Plus, they’re a hit with both kids and adults, often leaving your guests asking for the recipe.
Even better, they can be prepared ahead of time and stored in the fridge or freezer. This way, you’ll always have a quick snack or meal option ready to go. Discover the joy of creating your own cheeseburger pockets and enjoy quality homemade comfort food! For tips on meal prepping, check out this useful guide.

Ingredients for Cheeseburger Pockets
Creating cheeseburger pockets at home is a fun and satisfying culinary adventure. To get started, here’s a list of essential ingredients you’ll need to whip up these delightful bites.
List of Essential Ingredients
- 1 pound ground beef: This is the star of our filling, providing that classic cheeseburger taste.
- 1 small onion, finely chopped: For flavor and aroma.
- 2 cloves garlic, minced: Adds a wonderful depth of flavor.
- 1 tablespoon olive oil: Perfect for sautéing our onions and garlic.
- 1 teaspoon garlic powder
- 1 teaspoon onion powder
- ½ teaspoon salt
- ¼ teaspoon black pepper: To season the meat, offering that perfect touch of spice.
- 2 tablespoons ketchup: A must for that tangy flavor.
- 1 tablespoon yellow mustard: Adds a hint of acidity.
- 1 tablespoon Worcestershire sauce: For richness and umami.
- 1½ cups shredded cheddar cheese: Because what's a cheeseburger without cheese?
- 1 can refrigerated crescent roll dough (8 ounces): This shell envelops our filling and bakes to golden perfection.
These ingredients come together for a delicious and easy-to-make meal that’s perfect for any night of the week! If you’re curious about more delicious recipes, check out this comprehensive guide to meat-filled pastries for inspiration.
Preparing Cheeseburger Pockets
Transforming your kitchen into a cheeseburger haven has never been easier! These cheeseburger pockets bring together the wonderful flavors of a classic cheeseburger in a convenient pocket form, perfect for a quick meal or snack. Let’s dive into the easy steps for preparing these delicious pockets.
Gather the Ingredients
Before embarking on your cheeseburger pockets adventure, ensure you have everything ready. Here’s what you’ll need:
- 1 pound ground beef
- 1 small onion, finely chopped
- 2 cloves garlic, minced
- 1 tablespoon olive oil
- Spices: 1 teaspoon garlic powder, 1 teaspoon onion powder, ½ teaspoon salt, ¼ teaspoon black pepper
- Condiments: 2 tablespoons ketchup, 1 tablespoon yellow mustard, 1 tablespoon Worcestershire sauce
- 1 ½ cups shredded cheddar cheese
- 1 can refrigerated crescent roll dough (8 ounces)
Having your ingredients prepped means less stress and more fun while cooking!
Sauté the Onions and Garlic
In a large skillet, heat the olive oil over medium heat. Add your finely chopped onion and let it cook for about 3 to 4 minutes, or until it becomes soft and translucent. Then, toss in the minced garlic and cook for an additional 30 seconds; your kitchen will start smelling amazing! This base will elevate the cheeseburger pockets with rich flavor.
Cook the Ground Beef
Now, it’s time for the star of the show: the ground beef! Add it to your skillet, breaking it up into small pieces as it cooks. You'll want the beef to become nicely browned and fully cooked. This should take around 5–7 minutes. Once done, drain any excess fat for a healthier bite.
Combine Seasonings and Cheese
To the cooked beef mixture, add the garlic powder, onion powder, salt, black pepper, ketchup, mustard, and Worcestershire sauce. Stir everything together until well combined, and let it cook for another 2 minutes. Finally, remove the skillet from the heat and stir in a cup of shredded cheddar cheese until it melts beautifully into the mixture.
Assemble the Cheeseburger Pockets
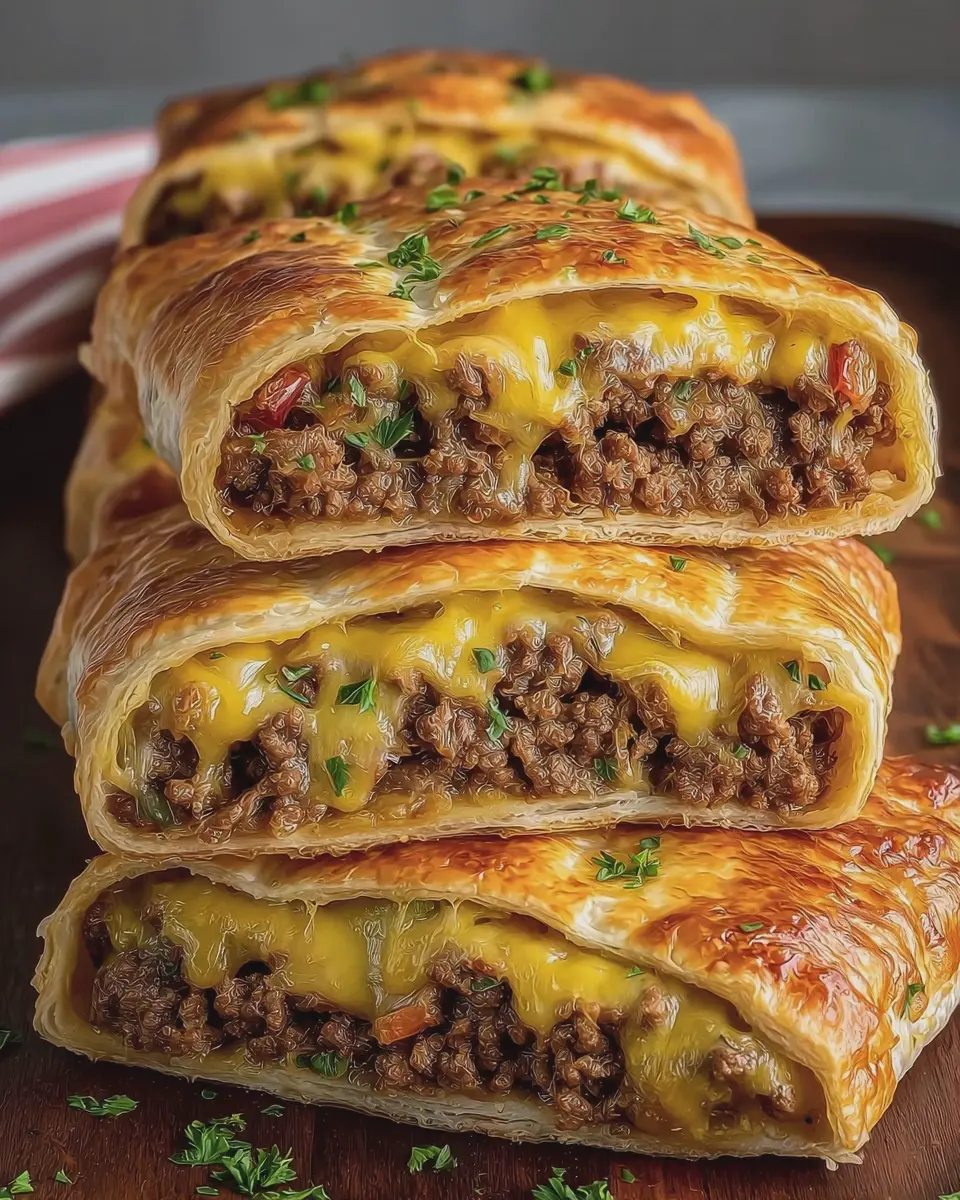
Now for the fun part! Preheat your oven to 375°F (190°C) and line a baking sheet with parchment paper. Separate the crescent roll dough into individual pieces and flatten each piece slightly. Spoon a generous amount of your cheesy beef mixture into the center of each dough piece, then sprinkle the remaining cheese on top. Fold the dough around the filling, pinching the edges to seal your pockets. Place them seam-side down on the prepared baking sheet.
Bake to Perfection
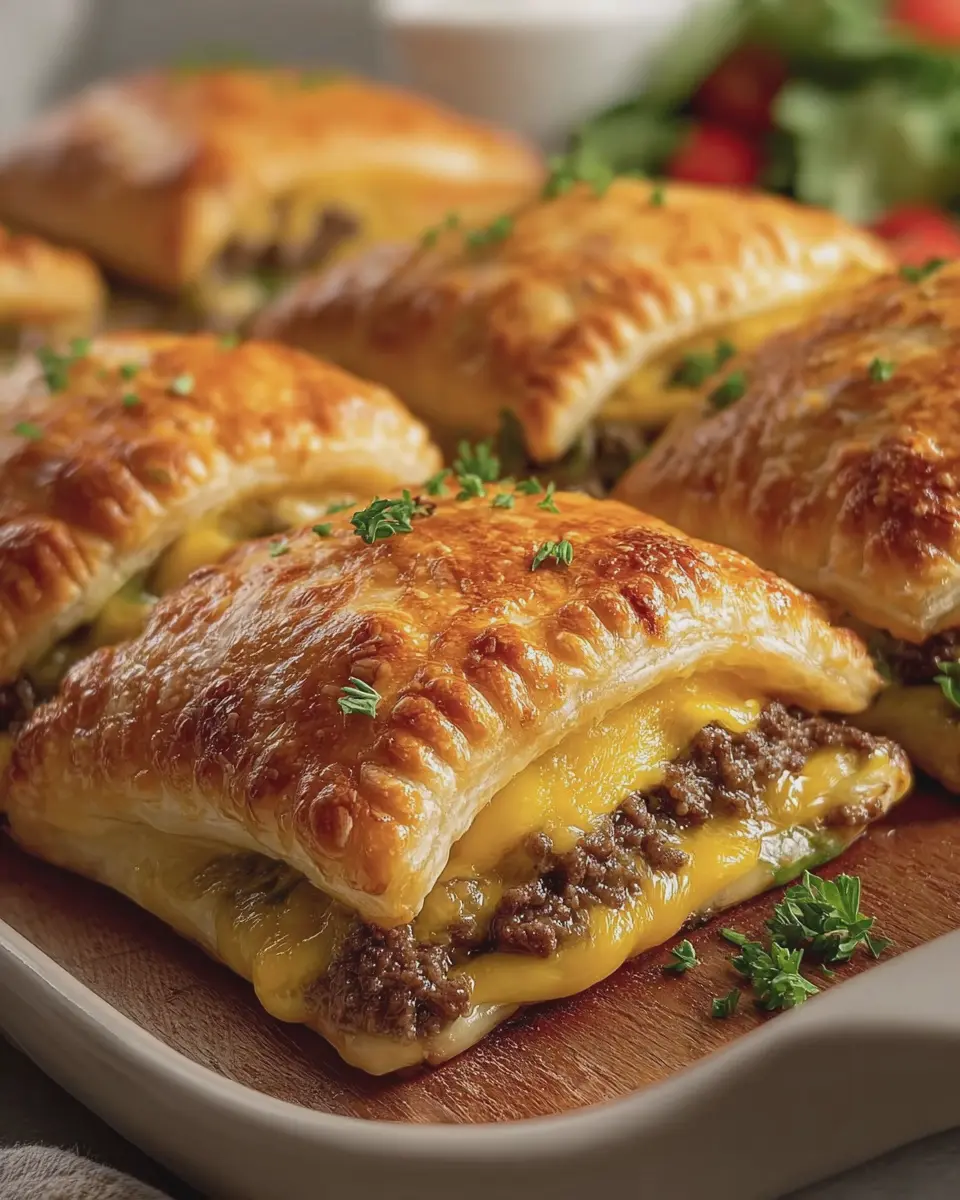
Pop your assembled cheeseburger pockets into the oven for 12 to 15 minutes, or until they are puffed and golden brown. While they’re baking, you can whip up a simple side salad or some dipping sauces. Once they’re done, allow them to rest for about 5 minutes before serving warm.
Your tasty cheeseburger pockets are ready to enjoy, bringing a touch of comfort food magic to your table!
Variations on Cheeseburger Pockets
Cheeseburger pockets are wonderfully versatile—perfect for customizing to match your cravings! Here are some delicious variations you can try:
Vegetarian Cheeseburger Pockets
For a meatless twist, substitute the ground beef with a combination of black beans, mushrooms, and bell peppers. This vibrant mix keeps every bite satisfying and delicious! Add some nutritional yeast for a cheesy flavor without the dairy.
Spicy Cheeseburger Pockets
If you love a kick, mix in some jalapeños or a few dashes of your favorite hot sauce. Pepper jack cheese can also elevate the spice level while keeping that classic cheeseburger taste.
Loaded Cheeseburger Pockets
Go big or go home! Add crispy turkey bacon, diced pickles, and a drizzle of your favorite barbecue sauce, creating an explosion of flavors. These pockets turn into the ultimate comfort food, keeping everyone at the table happy.
Experimenting with these variations will keep your cheeseburger pocket game strong. Happy cooking! For more amazing ideas, check out Food Network's recipes.
Cooking tips and notes for Cheeseburger Pockets
Ensuring good flavor
To elevate the flavor of your cheeseburger pockets, consider adding a splash of your favorite hot sauce or a sprinkle of smoked paprika to the meat mixture. You can also swap the cheddar for a blend of cheeses like Monterey Jack or mozzarella for a twist. Feeling adventurous? Add some diced pickles to the filling for a delightful tang!
Tips for perfect dough
When working with crescent roll dough, keep it cold for easier handling. If it becomes too soft, pop it in the fridge for a few minutes. Make sure to pinch the edges securely to prevent any cheesy goodness from leaking out during baking. For an extra golden finish, brush the tops with an egg wash before baking.
How to store leftovers
If you happen to have any cheeseburger pockets left, store them in an airtight container in the fridge for up to three days. Reheat them in the oven at 350°F (175°C) for about 10 minutes to restore their crispy texture. Alternatively, they can be frozen for up to a month—just ensure they’re wrapped tightly to avoid freezer burn. Enjoy your tasty leftovers!

Serving Suggestions for Cheeseburger Pockets
Dipping Sauces to Complement
Elevate your cheeseburger pockets with a selection of delicious dipping sauces. Consider tangy barbecue sauce for a smoky kick or creamy ranch dressing for a cool contrast. If you like a bit of heat, a zesty sriracha mayo can amp up the flavor profile. A side of ketchup and mustard always works wonders for that classic touch.
Perfectly Paired Sides
For a complete meal, think about pairing your cheeseburger pockets with light and refreshing sides. A crisp garden salad with a zesty vinaigrette pairs beautifully, balancing the richness of the pockets. Alternatively, crispy fries—whether classic, sweet potato, or even baked—add a familiar comforting element. You could even explore options like coleslaw for a crunchy texture contrast, making your meal satisfying and fun!
Feel free to experiment with different sides and sauces to create a meal that’s uniquely yours. For more inspiration, check out this guide to easy dipping sauces.
Time Breakdown for Cheeseburger Pockets
Preparation Time
Getting your ingredients ready is a breeze! Set aside about 15 minutes for chopping onions, mincing garlic, and prepping your cheeseburger filling. It's a quick process that sets the stage for deliciousness!
Cooking Time
Once you're prepped, the actual cooking takes just 20 minutes. This includes browning the beef and baking the pockets to golden perfection. Perfect for busy weeknights!
Total Time
In just 35 minutes, you’ll have scrumptious cheeseburger pockets on your table, ready to delight your family and friends. You’ll be amazed at how quickly this tasty dish comes together!
Making cheeseburger pockets is not only fast but also a fun skill to master. If you're intrigued by easy-to-follow recipes, consider checking out additional tips on meal prepping at The Kitchn.
Crafting these simple delights means you can enjoy homemade goodness without spending all day in the kitchen! Don’t hesitate to reach out if you have questions or modifications you’d like to try; the world of cheeseburger pockets is yours to explore!
Nutritional Facts for Cheeseburger Pockets
Calories
Each serving of cheeseburger pockets packs about 420 calories. This makes it a satisfying option for lunch or dinner, especially when you're craving something hearty without overindulging.
Protein
With 27 grams of protein per serving, cheeseburger pockets deliver a substantial boost to your daily intake. This high protein content can help keep you feeling full longer and supports muscle maintenance, making it a perfect choice for active lifestyles.
Sodium
Keep in mind that these cheeseburger pockets contain approximately 700 milligrams of sodium per serving. If you're watching your sodium intake, consider adjusting the amount of salt and certain sauces when you whip up this delicious recipe.
By making minor adjustments, you can still enjoy a tasty meal while being mindful of your nutritional needs. For more on balanced diets, check out the USDA's dietary guidelines. Remember, moderation is key!
FAQs about Cheeseburger Pockets
Can I make cheeseburger pockets ahead of time?
Absolutely! You can prepare the filling for cheeseburger pockets up to a day in advance. After cooking the ground beef mixture, let it cool and store it in an airtight container in the refrigerator. When you’re ready to bake, simply assemble the pockets and follow the baking instructions. They make for a great meal prep option!
What can I substitute for ground beef?
If you’re looking for alternatives to ground beef, there are plenty of options that still pack a flavor punch! Consider using ground turkey, chicken, or even plant-based meat substitutes like textured vegetable protein or lentils for a vegetarian option. Each substitute offers its own unique taste, so feel free to experiment to find your favorite.
How do I reheat cheeseburger pockets?
Reheating cheeseburger pockets can be quick and easy! You can use a microwave for a fast option, about 30-45 seconds should do the trick. If you prefer a crispy texture, pop them in the oven at 350°F (175°C) for about 10 minutes. This will help retain that delightful texture we all love!
Conclusion on Cheeseburger Pockets
In summary, cheeseburger pockets are a delightful blend of flavors and convenience, perfect for busy weeknights or casual gatherings. Their cheesy, savory filling wrapped in golden dough is sure to impress your friends and satisfy your cravings. Give this recipe a go—you won’t be disappointed!
For more tasty recipes, feel free to explore Epicurious for inspiration or visit Serious Eats for additional cooking tips. Enjoy your culinary adventure!
Cheeseburger Pockets
Ingredients
Equipment
Method
- Preheat the oven to 375°F (190°C).
- Line a baking sheet with parchment paper.
- Heat the olive oil in a large skillet over medium heat.
- Add the chopped onion and cook for 3 to 4 minutes until softened.
- Add the minced garlic and cook for 30 seconds until fragrant.
- Add the ground beef and cook while breaking it into small pieces until browned and fully cooked.
- Drain any excess fat.
- Add the garlic powder, onion powder, salt, black pepper, ketchup, mustard, and Worcestershire sauce. Stir until evenly combined.
- Cook for another 2 minutes.
- Remove the skillet from the heat and stir in 1 cup of shredded cheddar cheese until melted.
- Separate the crescent roll dough into individual pieces and flatten each piece slightly.
- Spoon the cheeseburger filling onto the center of each dough piece and sprinkle the remaining cheddar cheese over the filling.
- Fold the dough around the filling and pinch the edges firmly to seal.
- Place the pockets seam side down on the prepared baking sheet.
- Bake for 12 to 15 minutes until puffed and golden brown.
- Remove the pockets from the oven and allow them to rest for 5 minutes before serving warm.


Leave a Reply